Showing posts with label 20mm. Show all posts

Saturday, 27 October 2012

First outing for Ancient Egyptians and Hittites...and first try out of Basic Impetus rules

I have been struggling for some time to work up the energy to finish my Hittite army to be able to match them against my Ancient Egyptians/ A couple of months ago I finally started work. Steve and I had been thinking of giving Basic Impetus rules a spin. I'd been planning a 'double-based' DBA army but when I checked the Impetus army lists I found I had everything I needed already, bar some bow armed Egyptian skirmishers which I easily solved by painting up some Libyans. So earlier than expected I got the armies on the table using my magnetic unit bases for 'double-based DBA', which are conveniently exactly right for Impetus.

It was also the first outing for my 'plain terrain' boards.

Steve set up with chariots on his flanks, light troops covering the slopes of a valley and heavy infantry and archers in the centre, backed by his general's chariots. With a lot more chariots I set up in two lines. light in front, heavy behind, with most of my infantry in front of the rocky slopes on my right, apart from a unit of skirmishing archers on my left.
It quickly became apparent that maneuvering in Impetus is not easy. and chariots are especially difficult to maneuver, a simple wheel to avoid a wood disordered my light chariots.
I didn't bother reordering them as I wanted them to send them in to pepper Steve's infantry with arrows before pulling back to get ready for a charge. This didn't prove smart, as disordered moving chariots were outshot by standing infantry bowmen.

Good shooting destroyed one of my chariot units and damaged the other.
Steve moved up his infantry up but again any attempt to maneuver again just slowed things down,
I retreated my light chariots, advanced my heavy and moved my skirmishing archers into a palm grove on my right,
I turned around and rallied my light chariots and charged them into an infantry unit who destroyed them.
Our forces closed on my right flank but archery weakened one unit of heavy chariots
Steve's chariots swept out on to my left flank. but again had to stop because they were disordered.
In the infantry clash on my right Steve drove back some light infantry.
My heavy chariots lined up to charge.
I swung around my heavy spearmen, disordered again due to wheeling...
...but once rallied I could charge in...
My general's heavy chariots completely smashed a unit of Egyptian menfat heavy infantry leaving them to charge again ...straight into Steve's Pharaoh's chariot bodyguard
With the roll of an impressive 10 dice my charging general's heavy chariots scored two hits
Weakened the Pharoah retreated

A follow-up charge and they destroy the Pharoah's bodyguard!

Unfortunately this is not enough to turn the battle. Two light chariot and an infantry unit lost and my skirmishers scattered now my other heavy chariots get charged in the flank by a unit of Steve's chariots. .
....and the battle's over, despite the valiant actions of my General I've lost!
I have subsequently played a few more games of Impetus, particularly the Pike and Shot 'Impetus Baroque' version and really enjoyed it. For me, however, I was not greatly impressed in how they worked for the chariot period. I would have been much better off just lining my chariots up and charging straight in to get their Impetus bonus, but this doesn't really seem to jive with my idea of fluid light chariot tactics.

The 'plain terrain' boards livened up what would have been a dull playing cloth, it did, however show up my hills which looked a bit tatty, desert hills would have looked better, and the effect would probably have been better with more of them.

Friday, 3 February 2012

WW1 'Mid to Late war' British

These really nice figures are actually sold by Hat Industrie as World War I Canadians, but as far as I can tell any difference between the British and Canadian uniforms were absolutely minimal, and as there are only one other set of WW1 British with the helmets issued from 1916 onwards, they perhaps the best available.


I really like them, and much as having painted up a whole force of WW1 French, I have another army already to face off against my mid-late war Germans, it just didn't seem right not to be able to put on the Somme, Ypres and all the other charateristic battles of WW1 with British Tommies.


These figures don't get a great write up on Plastic Soldier Review, but I really, really like these figures. I think the poses are great and they are a nice 'large' figure in this scale, which go well with the Revell Germans.


The paint job isn't completely finished. I will probably give flesh, straps and packs a brown wash, and I'm umming and ahhing about whether to give all the uniforms a highlight before varnishing and terraining the bases, but I think they look pretty good as they are.


I have just short of 120 rifleman anf officers painted up. I just have the heavy weapons (machine guns, Lewis guns and mortars) and some command bases to make up. That should be plenty for a game with either Contemptible Little Armies or GW's 'Great War.... ....so as soon as they are done, it'll be 'Over the Top'...


Catching up on things completed in 2011: Napoleonic Skirmish Set for Sharpe Practice

One pair of armies that I seem to have missed out documenting for this blog is the Napoleonic skirmish set that I knocked out in the middle of 2011. The set had its origins in a conversation with Rob at my old club. I had bought a stack of Revell 20mm British Napoleonic Riflemen for 'paint conversion' to light infantry but Hat has since produced a British Light Infantry set, so I wasn't sure I'd need them. He mentioned he was inspired by a chapter in Bernard Cornwall's Sharpe books and might be interested in acquiring them to try out the Too Fat Lardies 'Sharpe Practice' ruleset. We never got around to arranging the sale and when I jogged his mind about it a year or so later he said if he was going to do it he would probably now do it in 28mm.

So in an idle moment I took a few Revell British Riflemen, based them on 2p coins(instead of the old 5 peseta coins or 1ps that I'd been using up to then) and painted them up. They weren't as good as the Italeri Indians which I tried lke this, but still looked quite nice for a little skirmish game. I had some Hat French Light Infantry that I'd bought and based and painted up a similar amount. Overall the two forces made a nice, if modest little set.

Based on 2p pieces they look great when terrained


I still didn't have any rules, so I was ordering a few different rule sets from Northstar games and included 'Sharpe Practice' on the list.


Once I got my hands on the rules, however, I discovered the rules were more designed for 'small unit' actions rather than man-to-man skirmishing, so my 15 or so figures per side would not really be enough. So I painted up a few more of each of the forces that I'd already done and ordered a box of Hat's Pennisular War British infantry.


I found a bunch of Italeri French Napoleonic Infantry I'd already undercoated and painted up three more units of each, so I had about four units of around 24 figures for each side. I based one of of each (British Light Infantry and a French Voltiguers) on 2ps in the same way.

I decided that for the close order troops 2ps did not look right, so reverted to 1p coins.


These guys are mounted on some of the movement trays for figures mounted on 1 pence pieces that I ordered from 'Warbases' when I got my 'War of the Rings' bases from them. I got them to try them out, and really liked them. They'll look even better once I've terrained them.

All the time I had been building this force, I had been working hard on my 'main' Napoleonic armies, and although finishing any of these big armies has for yet another year proved elusive, I did finish and terrain the bases of all my British and Napoleonic Cavalry and artillery.

Next up I needed a scenario and hunting on the internet I found a brilliant account on the 95th Rifle Renactors site of the action at Cacabellos on the retreat to Corunna. The action was perfect for our first 'Sharpe Practice' action.

I made up some cards on the PC and Steve and I had a game at the club. Both of us are 'grognards' and have seen lots of sets of rules come and go, but whether I'd set up the scenario well or it was the hidden strengths of the rules, I'm not quite sure but we had a really, really good game. It really added character to the gameplay to call out 'Captain Lawrence, 2nd Battalion 95th Rifles' as you drew each card which determines the order units move in, and even without the fancier character generation rules which we ignored, each commander developed their own character simply due to the number of influence points each one had, whether the dashing General Colbert, a 'Cock o' the Walk', who could quickly order and rally his dashing cavalry or a stumbling Lieutenant who struggled to get his men into action. We will DEFINITELY be given this rules another spin!

Saturday, 3 December 2011

Battle of Phocis

Steve and I got another night of DBA gaming in after a long work related break from wargaming at the club on Wednesday. Steve kindly brought along his 20mm Greeks so we could carry on with our Peloponnesian Wars campaign. Reading the Wikipedia account of the first Peloponnesian War I noticed one 'causus belli' was a war between for city-state of Phocis and Doris, the later being the home of the Dorians, who the Spartans claimed as ancestors. Flicking through the DBA army lists, I'd noticed two Phokian armies. both much lighter troops than the other 'spear' (ie. hoplite) based armies of the other Greek City States. I suggested it to Steve and he was happy to go for it. Steve had taken on the challenge of trying to beat my Athenian hoplites with his light Thracian peltasts in our last Peloponnesian outing, so it only seemed fare that I tried out the light infantry of the Phokian army list against the Dorians, and as Steve was playing the Spartans it seemed the right army for him to take. There are both early and late Phokian army lists, and strictly speaking I should have taken the early ones, but we have fudged this before, and taking on an army with 8 elements of psiloi seemed like a very big challenge! So I went for the later list, which only has two units of 'spear' heavy infantry, but has quite a few peltast 'auxilaries' as well as psiloi, and the option to take TWO elements of artillery, which Steve had two brilliant models in his collection. I forgot to get my camera into action at the start of the battle, but I remembered a couple of moves in. These are the results. I'd rolled up as 'defender' so, I set up terrain with a town (or BUA-in DBAspeak), with a road running through it which also passed through two woods-unfortunately all the trees in the club terrain box had already been raided-, one on either side of the town. I also added a large steep hill. Steve opted for a preference to attack from the side nearest the town. I set up behind the crest of the steep hill, with an element of hoplites garrisoning the town. Steve divided his Dorians into two forces, one to attack the town, the other to advance in a line to the right of the town. It rapidly became clear that Steve was not going to advance his troops up against mine on a steep hill, where I would have an advantage and would instead just reduce the town, so I decided to come off the hills and attack Steve's Dorians.

By time the first photo was taken I had light troops advanced to occupy woods on my right, and had wheeled my battleline to face Steve's line on this right. Steve had thrown out a force of cavalry and hoplites, to stop my light troops rushing out of the woods to ambush any of his besieging troops. He had attacked the town from two sides, and so far I had been successful in driving off all assaults and destroying one of Steve's hoplite elements in the process. My artillery had forced an element of psiloi to flee.


Steve's general element tried another assault on the town, but again the garrison drove them back and destroy a second element of hoplites attacking them from the other side of a town. The besiegers are finding the town a tough nut to crack. Steve's Dorians have already lost two elements.


This shot gives you a better ideal of the full battlefield, including the steep hill where I had first deployed.


Steve covers the gap in the Dorian line, but my artillery keeps forcing recoils.


I'm in no real hurry to match my peltasts, against his hoplites despite overlapping his line and I'm happy to shoot off my artillery.


Steve, though is keen to close with me and advances his line, with some hoplites that had been attacking the town filling the end of his line. He doesn't have the PIPs to take the recoiled peltasts with him. After a round of combat, one of my peltast elements recoils, but my general and his hoplite bodyguard and some slingers recoil their opponents.
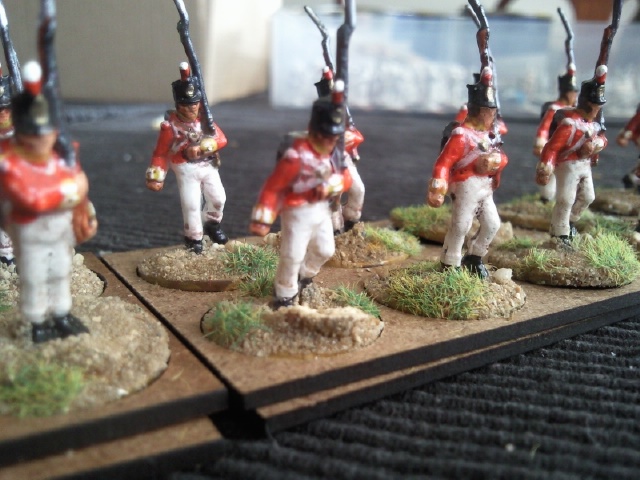


With an element of hoplites attacking from their flank, my slingers are destroyed.


A lousy PIP roll does not give me a lot of options...


...so I play it safe and swing my general's hoplite bodyguard to cover the exposed flank of the line...


....Fortunately in the shooting turn my artillery proves it's worth destroying an element of hoplites.


Nervous of an attack co-ordinated with my general's hoplites and my cavalry, Steve moves his exposed hoplites back into line.


I get a great PIP roll, which gives me the chance I need...


I rush my peltasts forward from either side of my artillery on the left of my line and pounce on Steve's peltasts which have been hanging back. A convincing 5-1 dice roll means that I have comfortably destroyed the element even without taking account the flank support!


...And that's it! Four Dorian elements destroyed for the loss of only one of my psiloi! No question of victory there. Two were smashed trying to assault my town walls, which vindicated my decision to put a garrisioned town on the battlefield.


I'd been fairly confident that I'd hold the town having seen a unit of Carthagininan spear manage to smash itself up in attacking a town garrisoned by Roman legionaries in the first game of DBA I referreed. Steve, however, pointed out to my although I got a +3 combat bonus for the garrison, a garrison is destroyed if merely pushed back, so 6-2, 6-1, or 5-1 dice roll would have done it (and a 6-3, 5-2 and 4-1 when attacking with his general). He also pointed out that destroying the garrison and capturing the town (BUA's counting as camps) would have been the equivalent of destroying three elements for victory purposes, so put him well on the course for victory, so maybe I'll be a bit less cocky next time!